nginx + PHP (php-fpm) のインストール

nginxのインストール

次の記事を参考にnginxをインストールします。

nginxのインストール

php-fpmのインストール

php-fpmとPHP関連のパッケージをインストールします。

yum install php-fpm php-mysql php-mbstring php-pear php-gd

PHPの設定 (php.ini)

タイムゾーンをAsia/Tokyoに設定します。

vi /etc/php.ini
;date.timezone =
date.timezone = Asia/Tokyo

php-fpmの設定

サーバの動作ユーザ、グループをnginxに変更します。

vi /etc/php-fpm.d/www.conf
;user = apache
user = nginx
;group = apache
group = nginx

ログディレクトリの所有者もapacheからnginxに変更します。

chown nginx /var/log/php-fpm/

php-fpmデーモンの起動

php-fpmデーモンをsystemctl経由で起動します。

systemctl start php-fpm

ホスト起動時のphp-fpmの自動起動を有効にします。

systemctl enable php-fpm
Created symlink from /etc/systemd/system/multi-user.target.wants/php-fpm.service to /usr/lib/systemd/system/php-fpm.service.

php-fpmデーモンの起動状態を確認します。

systemctl status php-fpm
● php-fpm.service - The PHP FastCGI Process Manager
   Loaded: loaded (/usr/lib/systemd/system/php-fpm.service; enabled; vendor preset: disabled)
   Active: active (running) since Wed 2017-03-29 14:06:29 UTC; 17s ago
 Main PID: 4392 (php-fpm)
   Status: "Processes active: 0, idle: 5, Requests: 0, slow: 0, Traffic: 0req/sec"
   CGroup: /system.slice/php-fpm.service
           ├─4392 php-fpm: master process (/etc/php-fpm.conf)
           ├─4394 php-fpm: pool www
           ├─4395 php-fpm: pool www
           ├─4396 php-fpm: pool www
           ├─4397 php-fpm: pool www
           └─4398 php-fpm: pool www

nginxにおけるPHP, FastCGIの設定

nginxにドメインexample.comの設定を追加します。phpファイルの場合はphp-fpm経由で処理をするFastCGIの設定を記述します。

vi /etc/nginx/conf.d/example.com.conf
server {
    listen       80;
    server_name  example.com;
    root   /var/www/webuser/example.com/htdocs;
    index  index.html index.htm index.php;

    location ~ \.php$ {
        try_files      $uri =404;
        fastcgi_pass   127.0.0.1:9000;
        fastcgi_param  SCRIPT_FILENAME $document_root$fastcgi_script_name;
        include        fastcgi_params;
    }
}

nginxコマンドの-tオプションで設定ファイルのテストをします。

nginx -t
nginx: the configuration file /etc/nginx/nginx.conf syntax is ok
nginx: configuration file /etc/nginx/nginx.conf test is successful

nginxをリロードして設定を反映します。

nginx -s reload

サイト管理ユーザの作成

サイト管理ユーザwebuserを作成します。

/usr/sbin/useradd webuser -m -d /var/www/webuser

passwdコマンドでwebuserのパスワードを設定します。

passwd webuser
Changing password for user webuser.
New password: (パスワード入力)
Retype new password: (パスワード再入力)
passwd: all authentication tokens updated successfully.

作成直後のホームディレクトリのパーミッションは700のため、nginxがアクセス出来るように711のパーミッションに変更します。

chmod 711 /var/www/webuser

Webコンテンツの配置

公開ディレクトリ/var/www/webuser/example.com/htdocs/を作成して、phpinfoを表示するinfo.phpを配置します。

mkdir -p /var/www/webuser/example.com/htdocs/
echo ' /var/www/webuser/example.com/htdocs/info.php

動作確認

http://example.com/info.phpにアクセスすることでphpinfoが表示されれば、動作することが確認できます。
nginxのインストール

ここでは、nginxをソースからインストールするのではなく、公式に配布されているプリコンパイルパッケージのリポジトリを利用してインストールする方法を説明します。

バージョンの選択

nginxにはStableとMainlineの2つのバージョンが存在し、yumリポジトリのURLも両者で分かれています。

通常は、新機能追加とバグフィックスが常時行われるMainlineバージョンを選択すればよいでしょう。

新機能は必要無く、APIの互換性を重視する場合は、Stableバージョンを選択することになるかと思います。プロダクションサーバにはStableバージョンが推奨されているようです。

NGINXのチュートリアル記事を引用しておきます。

Choosing Between a Stable or a Mainline Version

NGINX Open Source is available in two versions:

  • The mainline version. This version includes the latest features and bugfixes and is always up-to-date. It is reliable, but it may include some experimental modules, and it may also have some number of new bugs.
  • The stable version. This version doesn’t have new features, but includes critical bug fixes that are always backported to the mainline version. The stable version is recommended for production servers.

yumリポジトリの追加

nginxの公式リポジトリをyumに追加します。

Stableバージョンをインストールする場合

vi /etc/yum.repos.d/nginx.repo
--------------------------------------------------
[nginx]
name=nginx repo
baseurl=http://nginx.org/packages/centos/$releasever/$basearch/
gpgcheck=0
enabled=1
--------------------------------------------------

Mainlineバージョンをインストールする場合

vi /etc/yum.repos.d/nginx.repo
--------------------------------------------------
[nginx]
name=nginx repo
baseurl=http://nginx.org/packages/mainline/centos/$releasever/$basearch/
gpgcheck=0
enabled=1
--------------------------------------------------

nginxパッケージのインストール

yumでnginxパッケージをインストールします。

yum install nginx

nginxの起動

nginxを起動して、ホスト起動時にも自動で起動する設定を有効にします。

nginxをsystemctl経由で起動します。

systemctl start nginx

ホスト起動時のnginxの自動起動を有効にします。

systemctl enable nginx
Created symlink from /etc/systemd/system/multi-user.target.wants/nginx.service to /usr/lib/systemd/system/nginx.service.

nginxデーモンの起動状態を確認します。

systemctl status nginx
● nginx.service - nginx - high performance web server
   Loaded: loaded (/usr/lib/systemd/system/nginx.service; enabled; vendor preset: disabled)
   Active: active (running) since Sun 2017-03-05 02:51:27 UTC; 1h 6min ago
     Docs: http://nginx.org/en/docs/
 Main PID: 23058 (nginx)
   CGroup: /system.slice/nginx.service
           ├─23058 nginx: master process /usr/sbin/nginx -c /etc/nginx/nginx.conf
           └─23059 nginx: worker process

nginx.service; enabledの箇所で自動起動が有効になっており、active (running)の箇所でデーモンが起動していることが分かります。

ファイアウォールの設定

firewalldでファイアウォールを設定している場合は、外部からのhttpサービス (80番ポート) への通信を許可する必要があります。firewall-cmdコマンドでpublicゾーンにhttpサービスを永続的(permanent)に追加します。

firewall-cmd --add-service=http --zone=public --permanent
systemctl reload firewalld.service

iptablesコマンドでhttpが追加されていることを確認します。

iptables -L
(省略)
Chain IN_public_allow (1 references)
target     prot opt source               destination
ACCEPT     tcp  --  anywhere             anywhere             tcp dpt:http ctstate NEW
ACCEPT     tcp  --  anywhere             anywhere             tcp dpt:ssh ctstate NEW
(省略)

動作確認

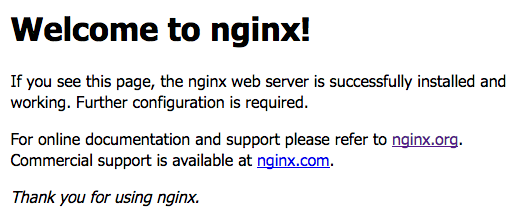
curlコマンドでnginxへアクセスして簡単に動作確認してみます。可能であればブラウザでも確認してみるとよいでしょう。

# curl localhost
<!DOCTYPE html>
<html>
<head>
<title>Welcome to nginx!</title>
<style>
    body {
        width: 35em;
        margin: 0 auto;
        font-family: Tahoma, Verdana, Arial, sans-serif;
    }
</style>
</head>
<body>
<h1>Welcome to nginx!</h1>
<p>If you see this page, the nginx web server is successfully installed and
working. Further configuration is required.</p>

<p>For online documentation and support please refer to
<a href="http://nginx.org/">nginx.org</a>.<br/>
Commercial support is available at
<a href="http://nginx.com/">nginx.com</a>.</p>

<p><em>Thank you for using nginx.</em></p>
</body>
</html>